
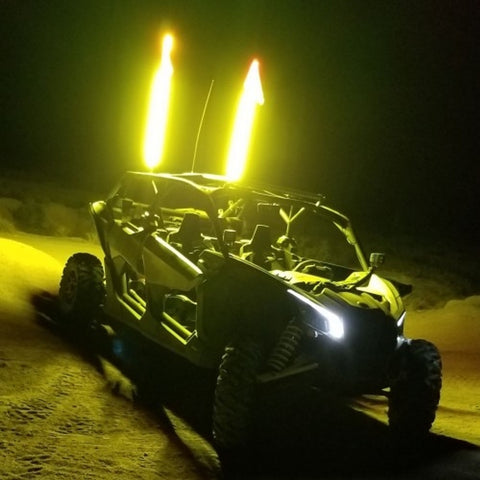
Best UTV Light Ba...
Sep 18, 2026

A UTV light bar is the difference between riding confidently after dark and creeping along at half speed hoping you spot the next rut in time. Factory headlights on most side by sides are adequate for slow, familiar terrain, but they fall short the moment you are moving at speed on unfamiliar trails, navigating technical sections, or heading out before sunrise for a hunt. This guide covers how to choose the right light bar for night riding, including beam patterns, sizing, mounting positions, and the wiring details that matter more than most buyers expect.
A UTV light bar is an elongated LED lighting unit mounted to the roof, roll cage, bumper, or windshield frame, designed to project significantly more light forward than factory headlights. Unlike whip lights, which make your vehicle visible to others, a light bar exists to help you see the terrain ahead. Modern units use LED technology almost exclusively, offering high light output with relatively low power draw and strong durability against the vibration and impact that comes with off road use.
Beam pattern is the single most important specification to understand, and it is where many buyers make their choice without fully knowing what they are getting.
Spot beams project a narrow, focused cone of light far down the trail, typically illuminating a long distance but a relatively narrow width. This is useful for higher speed riding where you need advance warning of what is coming, but a spot beam alone leaves the sides of the trail poorly lit.
Flood beams project a wide, diffused light pattern that illuminates a broad area close to the vehicle. This works well for slow speed technical riding, work sites, or camp setup, but does not reach far enough ahead for confident higher speed riding.
Combo beams blend both patterns in a single unit, typically with spot optics in the center and flood optics toward the outer edges. For most riders doing mixed night riding, a combo beam offers the most practical balance, providing both distance visibility and peripheral coverage without needing two separate lights.
Light bars generally range from around 6 inches up to 50 inches or more. Smaller bars in the 6 to 12 inch range work well as supplemental lighting, mounted on bumpers or A pillars to fill gaps that a primary light leaves dark. Mid size bars in the 20 to 30 inch range are a common choice for roof or bumper mounting, offering substantial output without overwhelming the vehicle's electrical system or looking disproportionate on smaller machines. Larger bars from 40 to 50 inches deliver the most output and are typically roof mounted on full size UTVs, though they draw more power and require more attention to proper wiring and fusing.
Bigger is not automatically better here. A 50 inch bar on a machine with a modest electrical system, wired without a proper relay, creates more problems than it solves. Matching bar size to both your vehicle's electrical capacity and your actual riding needs produces better results than simply buying the largest option available.
Roof mounting provides the highest vantage point, which reduces shadows cast by terrain and gives the broadest view of the trail ahead. The trade off is that light mounted above your eye line can reflect off dust, fog, or falling snow, creating glare that actually reduces visibility in those specific conditions.
Bumper or grille mounting places the light lower, which cuts through dust and fog more effectively since the beam travels under much of the suspended particulate rather than through it. The lower position casts longer shadows from rocks and ruts, which some riders actually find helpful for reading terrain texture.
A pillar or windshield frame mounting positions smaller lights at roughly eye level, often used for supplemental ditch lights that illuminate the sides of the trail rather than directly ahead.
Many experienced night riders run a combination, typically a primary roof or bumper bar paired with smaller supplemental lights, rather than relying on a single unit to handle every lighting need.
Lumens versus usable light: raw lumen ratings are frequently inflated in budget listings, so look for units from manufacturers who publish honest, tested output figures rather than relying on the highest advertised number
IP rating: look for IP67 or higher for genuine protection against dust and water submersion, since a light bar mounted externally will face constant exposure
Amperage draw: confirm your electrical system can handle the light bar's current draw, particularly if you are already running other accessories like a stereo system or winch
Housing material: aluminum housings dissipate heat better than plastic, which matters for LED longevity since heat is the primary factor in LED degradation over time
Color temperature: measured in Kelvin, with most off road light bars falling between 5000K and 6500K, producing a white to slightly blue tinted light. Lower temperatures penetrate dust and fog somewhat better, while higher temperatures appear brighter to the eye
This is where light bar installations most commonly go wrong. A light bar drawing significant current should always be wired through a relay rather than running full current through a dashboard switch, since most switches are not rated for the amperage a large light bar pulls. Install an appropriately rated fuse as close to the power source as practical, protecting the entire wiring run rather than just the light itself.
Route wiring away from exhaust heat, moving suspension components, and sharp frame edges, securing it with zip ties at regular intervals to prevent chafing from vibration over time. Use dielectric grease on all connections to prevent corrosion, particularly important given how much moisture and mud a UTV encounters. Connect to a switched circuit rather than constant battery power so the light cannot accidentally be left on and drain the battery while parked.
Many jurisdictions restrict the use of auxiliary lighting on public roads, and some require light bars to be covered or disabled when operating on public roadways. If your UTV is registered as street legal, check your state's specific requirements regarding auxiliary lighting before assuming a roof mounted bar is legal to run on the road. Regulations vary considerably by state, and the rules for off road use on trails often differ from those governing public road operation.
High speed trail and dune riding: prioritize spot or combo beams with strong distance projection, since you need advance warning of terrain changes at speed. A roof mounted bar in the 30 to 50 inch range is common for this application.
Technical and rock crawling: flood or combo beams matter more here, since you are moving slowly and need to see immediate surroundings clearly rather than far ahead. Supplemental ditch lights are particularly valuable for reading obstacles beside the vehicle.
Hunting and early morning work: a combination of moderate output and the ability to switch lighting off quickly matters, since you often need visibility during the approach but not once you are set up. Consider a bar with an easily accessible switch and moderate rather than maximum output.
Dusty conditions: lower mounted lights generally outperform roof mounted units in heavy dust, since the beam travels beneath much of the suspended particulate rather than reflecting off it back toward your eyes.
These two accessories are frequently confused, but they serve opposite purposes. A light bar helps you see the trail. Whip lights help others see you. Both matter for night riding, and most experienced riders eventually run both rather than choosing between them. For a deeper look at the visibility side of night riding, our guide on the best LED whip lights for UTVs covers what to look for in that category specifically.
Buying based on advertised lumens alone. Budget manufacturers routinely inflate lumen ratings, sometimes by a factor of two or more. Reputable brands publishing tested output figures are a more reliable indicator of real world performance than the highest number on a listing page.
Skipping the relay. Running full current through a standard dashboard switch is a genuine fire risk with higher output light bars, and it is one of the more common wiring shortcuts riders take without realizing the danger.
Choosing a spot beam for slow technical riding. A narrow spot beam leaves the immediate surroundings dark, which is exactly the area you need to see when navigating rocks and obstacles at low speed.
Mounting a large roof bar without considering dust conditions. If you regularly ride in heavy dust, a roof mounted bar can reflect light back at you, reducing visibility rather than improving it. Lower mounting positions handle this condition better.
Ignoring total electrical load. Adding a large light bar to a machine already running a winch, stereo, and heated grips can exceed what the charging system comfortably supports, leading to battery drain during extended use.
Clean the lens regularly, since accumulated mud and dust significantly reduces effective output even on a high quality unit. Check mounting hardware periodically for looseness from vibration, which is one of the most common causes of a light bar shifting out of alignment or eventually failing at the mount. Inspect wiring connections for corrosion, particularly at any point where the harness passes through a grommet or connects to the battery. If your light bar develops flickering or intermittent operation, check ground connections first, since a poor ground is the most common cause of these symptoms before the LED unit itself fails.
For most riders, a 20 to 30 inch combo beam bar provides sufficient output for confident night riding without excessive electrical draw. Larger 40 to 50 inch bars offer more output and suit high speed riding on open terrain, but require more attention to wiring and electrical capacity.
Spot beams project light far ahead in a narrow pattern, flood beams illuminate a wide area close to the vehicle, and combo beams blend both. For general night riding, combo beams offer the most practical balance.
For anything beyond very low output lights, yes. A relay allows a low current switch to control the high current circuit safely, preventing the switch from overheating under a load it was not designed to handle.
Roof mounting gives the best overall visibility and fewest terrain shadows, while bumper mounting performs better in dusty or foggy conditions. Many riders run both a primary bar and supplemental lights rather than relying on one position.
This varies significantly by jurisdiction. Many areas restrict auxiliary lighting use on public roads and may require covers when driving on roadways, so check your state's specific regulations before running a light bar on public roads.
Quality LED light bars with good thermal management often last many thousands of hours of use, since heat dissipation is the main factor in LED longevity. Cheaper units with plastic housings and poor heat management typically fail considerably sooner.
Choosing the right UTV light bar for night riding comes down to matching beam pattern and mounting position to the terrain and speeds you actually ride, then wiring it correctly so it performs reliably over time. A combo beam bar in the mid size range, properly wired through a relay and mounted where it suits your typical conditions, covers most riders' needs well. For those regularly riding in dust or fog, experimenting with a lower mounting position often produces better real world results than simply adding more output from above.
If you are building out a complete night riding setup, pairing a light bar with a set of whip lights covers both sides of the equation: seeing the trail clearly and making sure other riders can see you.

Sep 18, 2026

Sep 16, 2026

Sep 12, 2026
